 InkFlow Tool Operation
The InkFlow tool works largely in conjunction with the associated InkFlow panel, which should generally be open and accessible. If you are using the free Astute Graphics plugin DirectPrefs, you can have the InkFlow panel automatically be shown when the InkFlow tool is selected.
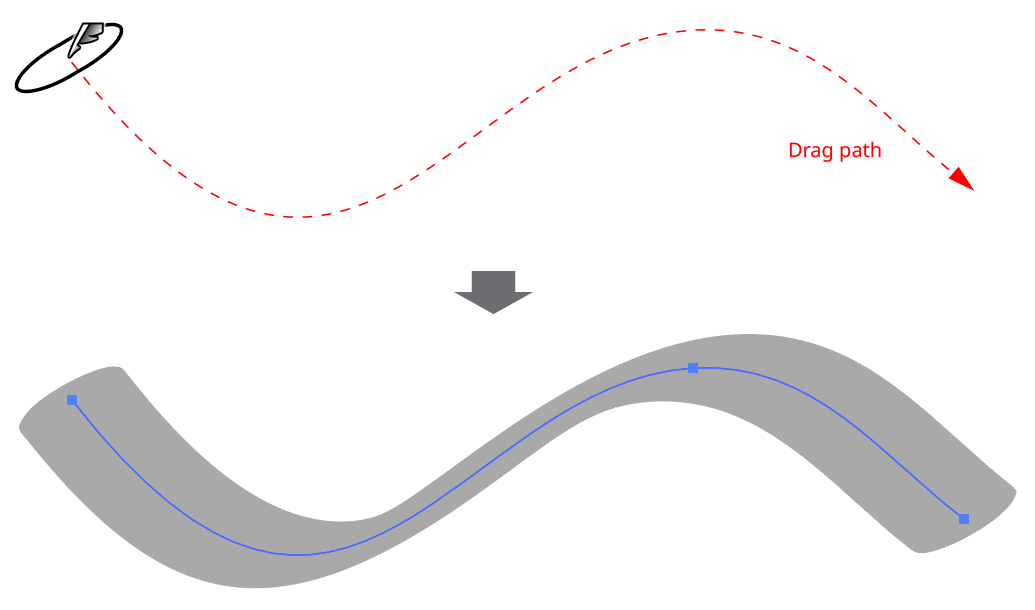
After selecting the InkFlow tool from the toolbox (or by clicking on the blue panel banner in the InkFlow panel), simply drag it to create a calligraphic stroke, in which the ellipse representing the tip is extruded along the tool’s path. The tool’s size, roundness, and angle will reflect what is specified on the panel.

InkFlow Basic Example
The pen’s size can be adjusted (before, but not while dragging) by using the keys assigned to Decrease Diameter and Increase Diameter in the native Keyboard Shortcuts dialog (the left and right square bracket keys respectively, by default, for English language keyboards). If one or more InkFlow paths are selected, the first use of either keypress will deselect the path(s) rather than change the size. The pen size may also be changed via the InkFlow panel. When using a stylus input device, and pressure-control is enabled for the pen size, the cursor’s preview ellipse shows its maximum size.
While dragging, a preview of the stroke will be shown (in black, by default). Just as with the native Brush, this preview is only approximate and is not as smooth or refined as the final stroke.
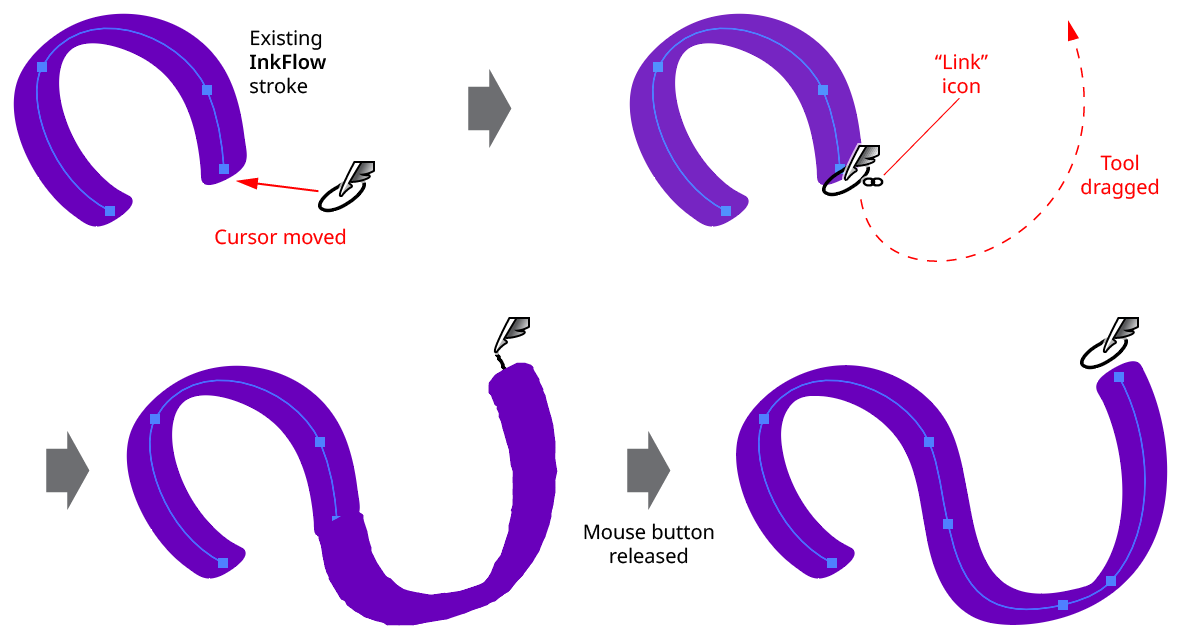
An existing InkFlow path can be continued or reshaped by the InkFlow tool as long as the path is selected and the Edit Continue Selected Paths preference is enabled (which is the default). Additionally, the cursor must start within a certain distance (specified in the preferences dialog) of the existing path. When this is the case, the cursor will display a “link” badge, indicating that Edit/Continue mode is active. Dragging will then edit or continue the existing path, much like the native Pencil tool. Two InkFlow paths can also be joined together; the joined path will receive the appearance of the path which is lower in the stacking order.

InkFlow Continue Path
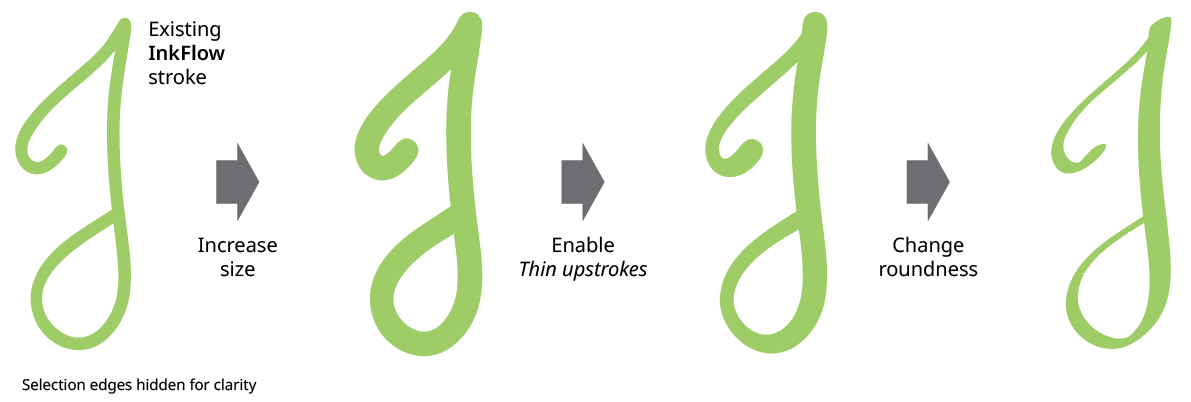
Unless the InkFlow preference Expand Strokes is enabled, paths drawn with the InkFlow tool will be assigned the InkFlow live effect, which can be seen in the Appearance panel. As with all live effects, it can be hidden or shown, moved to a different path, or have its parameters changed any time after the path was drawn (using the InkFlow panel), which allows you to try different looks without having to repeatedly redraw the path from scratch.

InkFlow Changing Parameters
Like the Astute Graphics Dynamic Sketch tool, the InkFlow tool cursor is pulled by a virtual “string,” which can be set from 1 to 100 pixels in length. A pulled cursor has the effect of smoothing out small jitters in its motion, resulting in a smoother path. With higher string lengths, sharp corners can be easier to create, because moving backwards slightly with the cursor simply creates slack on the string without creating new path points; the cursor can then be pulled in a new direction to create the sharp corner.

InkFlow Pulled Cursor
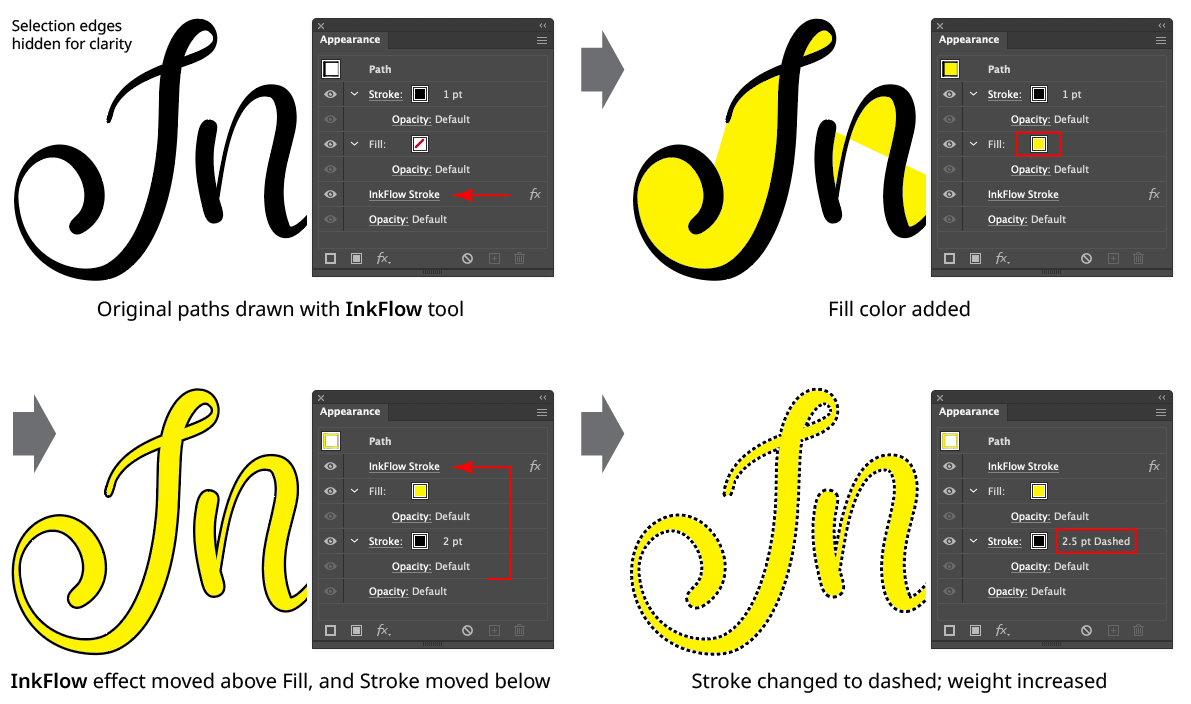
When an InkFlow path is drawn, it is given a stroke (unless the new art style already has one) and any fill is removed. The InkFlow live effect is added and positioned below the stroke and fill, and replaces the basic stroke. Adding a fill color generally only makes sense if the drawn path is closed.
However, if the InkFlow live effect is moved to the top of Appearance stack, then the stroke and fill are applied to the outline of the calligraphic stroke, allowing additional creative possibilities:

InkFlow Live Effect Positioning
Although InkFlow is a live effect, it is not possible to add it directly from the live effects menu like most live effects. Instead, at least the first instance must be generated by the InkFlow tool.
Other features and operations of the InkFlow tool are discussed in conjunction with the InkFlow panel, below.