Transform
Stylism Tool
Inflate Deflate Tool
Inflate Deflate Tool
Illustrator Location:
Advanced Toolbar > Stylism Tool
The interactive controls for the native Transform live effect are as follows:
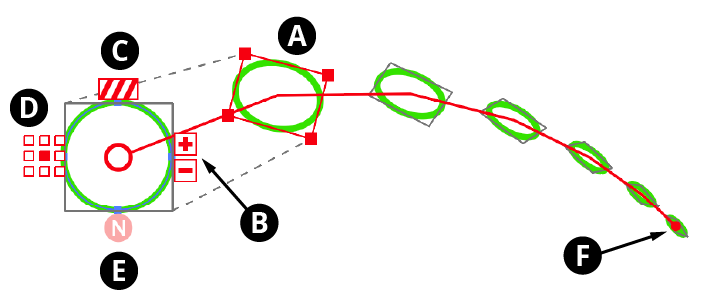
Stylism Transform Controls
A. Transformed Object Bounds
The bounds of the object after it has been offset, scaled, and rotated are indicated by a red rectangle with nodes at each corner. Dashed grey lines connect the corners of the rectangle with the original object’s bounds, indicated by a rectangle of solid grey lines. Each of the transform parameters may be changed by using the Stylism tool on this rectangle:
Offset: Hovering the cursor over the bounds rectangle (except over an edge or corner) displays the current offset values (
Option/Alt-clickingon the bounds toggles the readout between X/Y mode and distance/angle mode). Dragging the bounds rectangle (except on an edge or corner) changes the offset (holdShiftto constrain the motion to 45° increments around the general constrain angle). The rectangle may also bedoubleclickedto enter the offsets numerically, either as the standard X and Y values, or as distance and angle values:
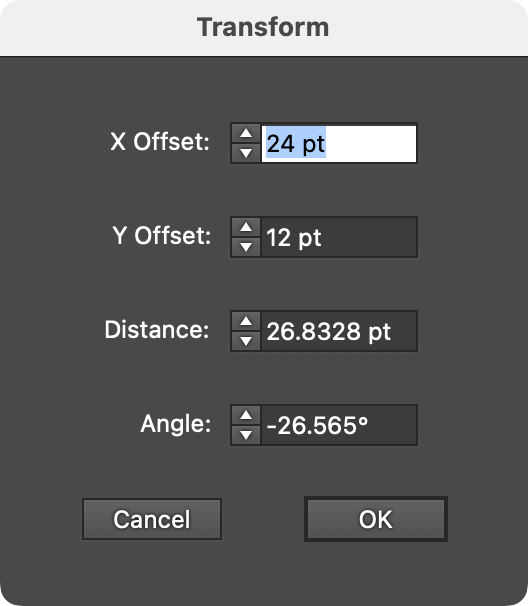
Stylism Transform Offset Dialog
Scale: Dragging one of the corner nodes of the bounds rectangle changes the scaling. Holding
Shiftwhile dragging constrains the aspect ratio. To change only the horizontal scale or only the vertical scale, drag an edge. To specify the scaling numerically,doubleclickone of the edges of corners:
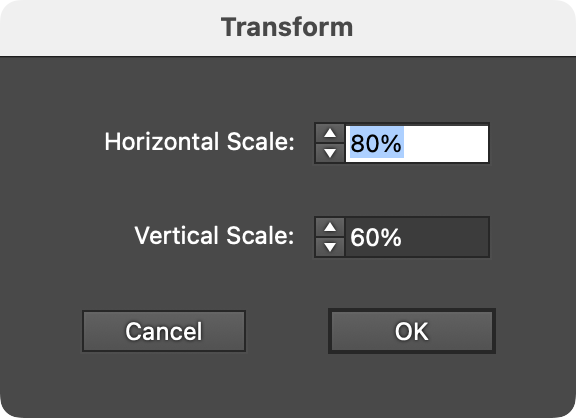
Stylism Transform Scale Dialog
Rotation: When the cursor if hovering outside the rectangle but near one of the corners, the current rotation value will be displayed. Dragging from this location changes the rotation. While dragging, holding
Shiftconstrains the rotation to 45° increments around the general constrain angle.Doubleclickingwhile the current rotation value is being displayed brings up a dialog letting you change the rotation value numerically:
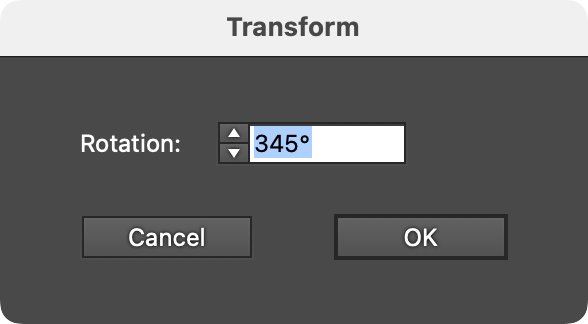
Stylism Transform Rotation Dialog
B. Increment/Decrement Copies
The buttons marked with “+” and “–” increment and decrement the number of transformed copies, from 0 to 1000. Pressing Shift while clicking a button will change the value by 10 instead of 1. Pressing Option/Alt while clicking the button will change number of copies while also retaining the position of the last transformed copy:
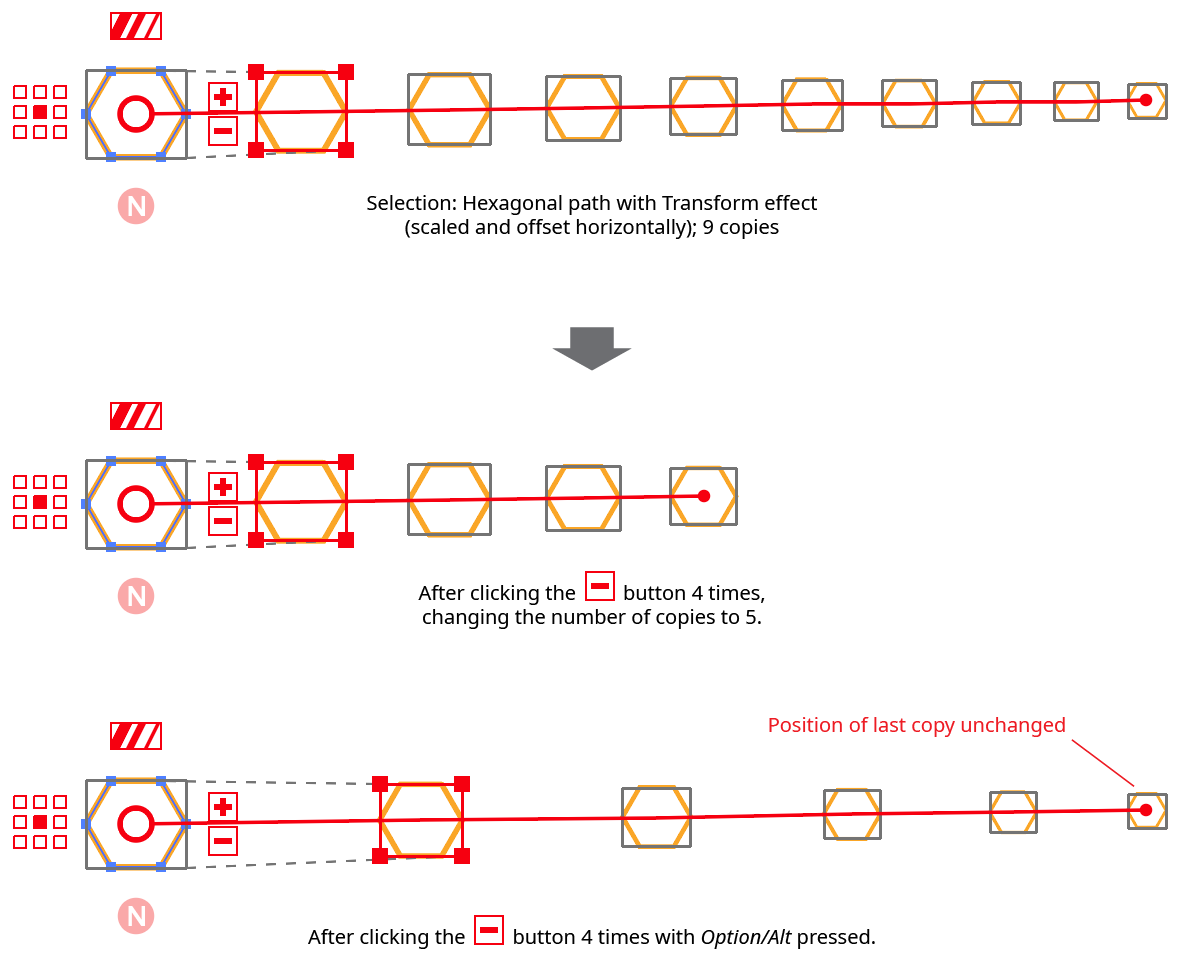
Stylism Transform Copies Button Example
Each copy is joined by a thin red line (the copy chain line), and each copy except the first has its bounding box marked with a rectangle of solid grey lines.
C. Scale Strokes & Effects
Controls the Scale Strokes & Effects setting. When disabled, it shows three stripes of the same width; when enabled, three stripes of varying widths. Clicking the button toggles the setting.

Stylism Transform Scale Strokes Example
D. Reference Point
This nine-block widget is similar to the smaller version in the Transform effect parameters dialog, and specifies the reference point (position of the transformation point relative to the bounds of the original object).
E. Randomize
Toggles the Random parameter of the live effect. When disabled, the button displays “N” (for non-random); when enabled, it displays “R”.
F. Transform Copy Chain Tip
Marks the position of the last copy in the copy chain. When the cursor is hovered over it, a display of the current number of copies will appear. Dragging the control changes the number of copies, extending or shortening the copy chain:
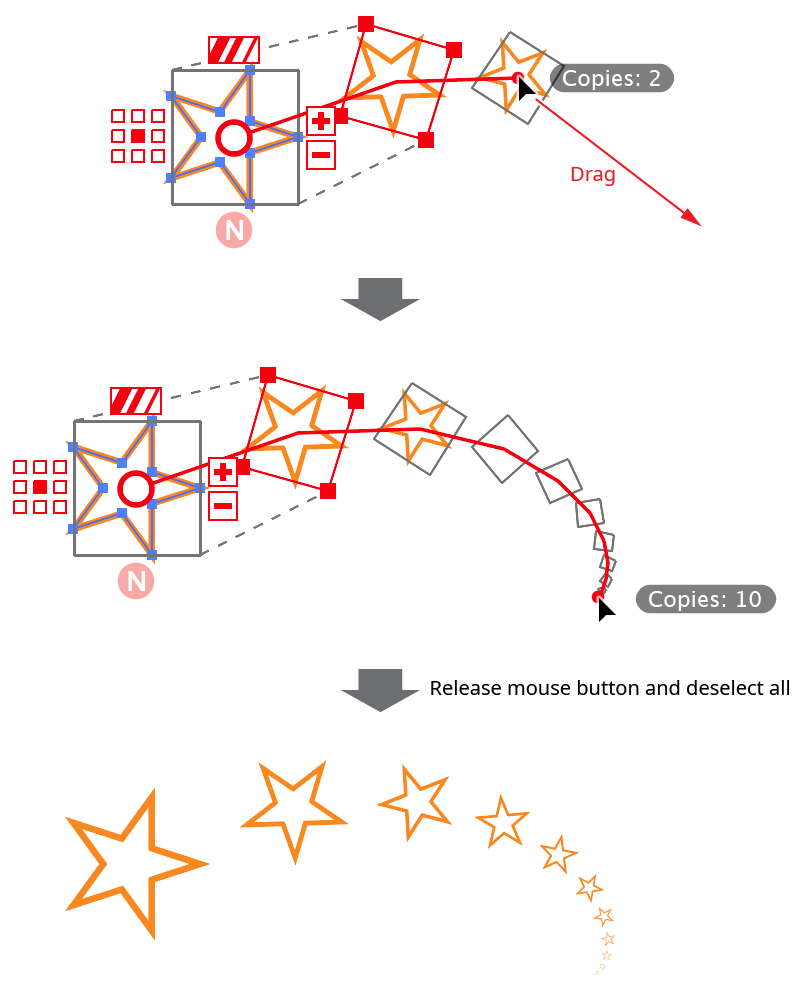
Stylism Transform Copy Chain Drag
Dragging the copy chain tip with Option/Alt held down allows you to move the position of the last copy (and, therefore, all intermediate copies) while retaining the current number of copies. Stylism achieves this by calculating and applying the necessary offset values such that the last copy lands at the given coordinates. The scaling and rotation values are not changed.
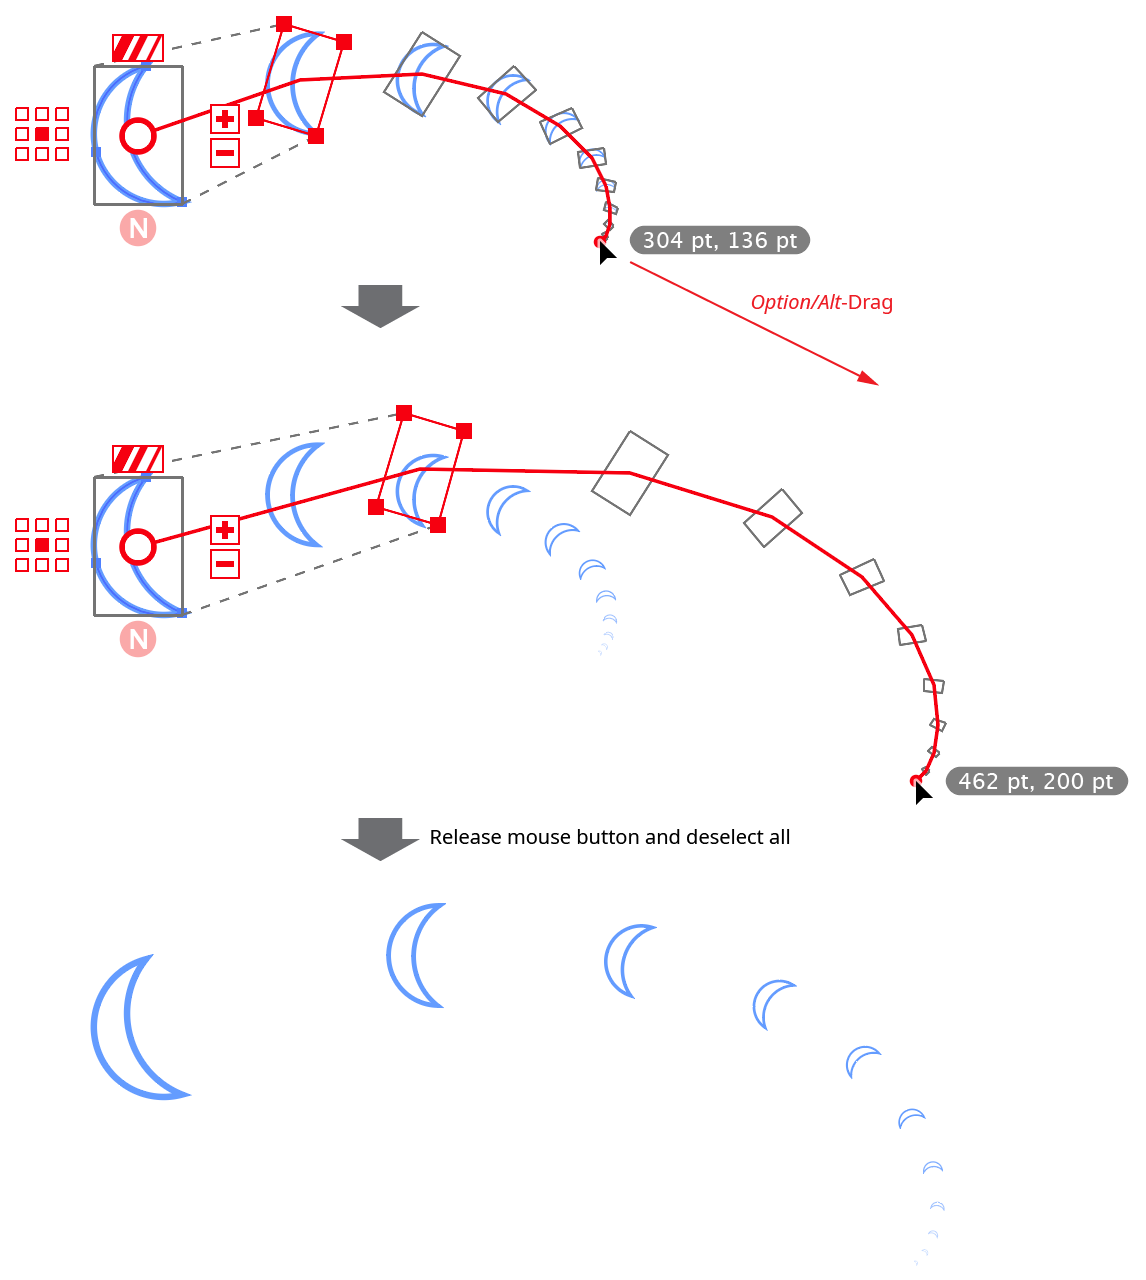
Stylism Transform Copy Chain Drag with Option
Doubleclicking the control brings up a dialog in which the number of copies can be directly entered. If Option/Alt is being held down (so the coordinates of the last copy are displayed), a dialog in which the coordinates can be numerically entered is displayed.
Illustrator Location:
Advanced Toolbar > Selection Stack > Inflate Deflate Tool
Inflate Deflate is an Astute Graphics tool for Adobe Illustrator that moves art objects further apart or closer together without changing their size. The motion can be constrained to the horizontal, vertical, or general constrain angle directions, and an optional “warp factor” can create special effects. Inflate Deflate is part of the ColliderScribe plugin.
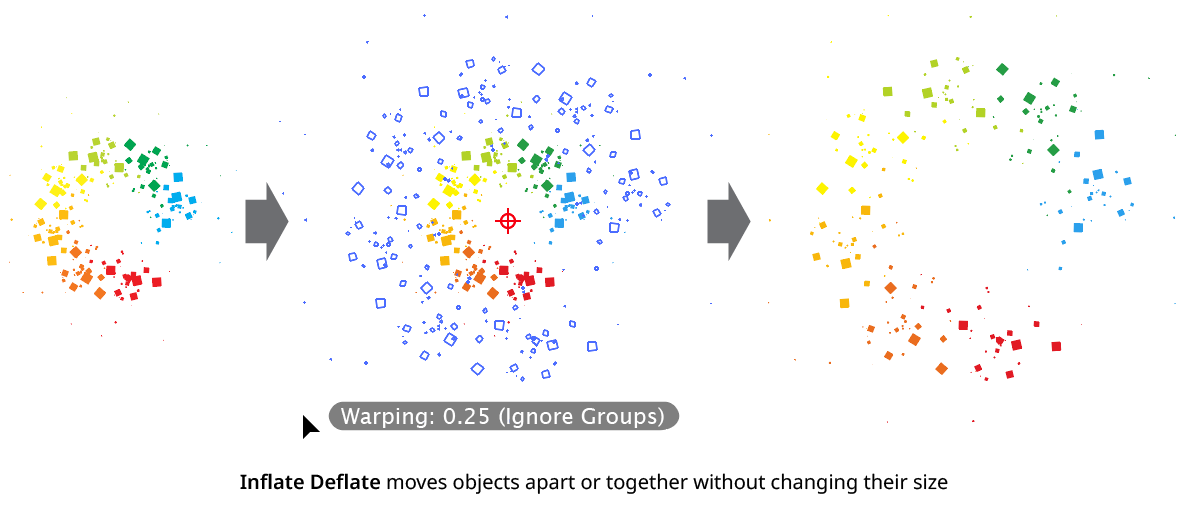
Inflate Deflate Tool Example
Tool Location and Cursor Appearance
The Inflate Deflate tool appears in Illustrator’s main toolbar (which must be in Advanced mode: View > Toolbars > Advanced) stacked under the native Selection tool along with ColliderScribe’s other tools. As with other stacked tools, click and hold on the top tool icon to display the tools stacked under it.
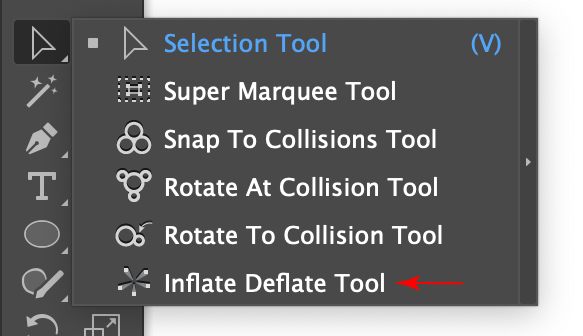
Inflate Deflate Tool Location
The Inflate Deflate tool’s cursor is a crosshair by default, but changes when it is being dragged to transform artwork:

Inflate Deflate Tool Cursors
Illustrator Location:
Advanced Toolbar > Selection Stack > Inflate Deflate Tool
As the Inflate Deflate tool has several keypresses which can add or change its functionality, we strongly suggest installing the free Astute Graphics plugin Astute Buddy, which creates a panel that dynamically updates to inform you of the various keys which can be pressed in the tool’s current context.
After selecting some artwork, choosing the Inflate Deflate tool will display a small red crosshair annotation, which indicates the position of the transformation point, about which the expansion or shrinkage of the art will take place. Dragging with the tool will move the art further apart (as the cursor is dragged away from the transformation point) or closer together (as the cursor is dragged towards the transformation point). During the drag, the new positions of the art will be displayed as wireframes.
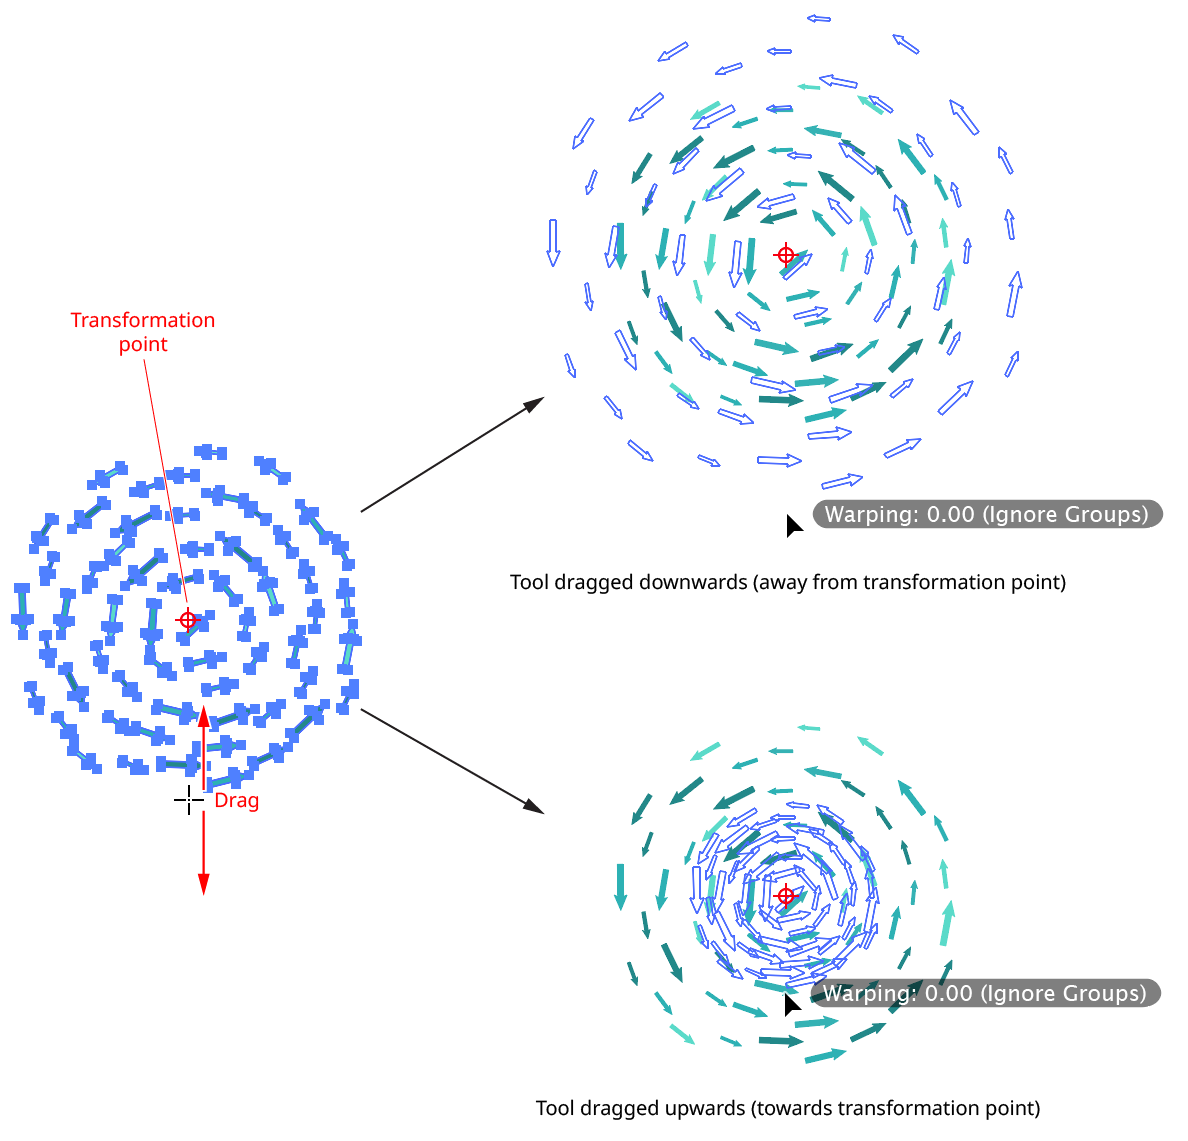
Inflate Deflate Out or In
When the mouse button is released, the art objects are moved to their final positions.
Although the transformation point is placed, by default, at the center of the bounding box of the selected art objects, it can be relocated using one of several methods. First, the tool may simply be clicked (without dragging), which will move the point to the clicked location. Second, the point may be dragged, with the Shift key constraining its movement to 45° increments around the general constrain angle and the Command/Ctrl key overriding snapping. Finally, the point may be doubleclicked, which brings up a small dialog allowing the position to be specified numerically:
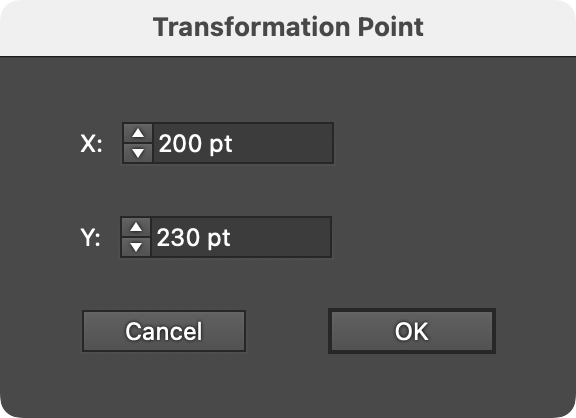
Inflate Deflate Transformation Point Numeric Specification
The Inflate Deflate tool preference Reset Transformation Point When Selection Changes controls whether or not the transformation point remains in the same position when the selection of art objects changes.
Pressing one or more modifier keys while dragging the tool changes its functionality:
Shift: Transforms the art only in the horizontal direction.
Option/Alt: Duplicates the selected objects to the new locations instead of moving them.
Command/Ctrl: Transforms the art only in the vertical direction.
Shift+Command/Ctrl: Transforms the art only along the direction of the general constrain angle; i.e., only the components of each object’s movement vector that lies along the direction of the constrain angle are used.
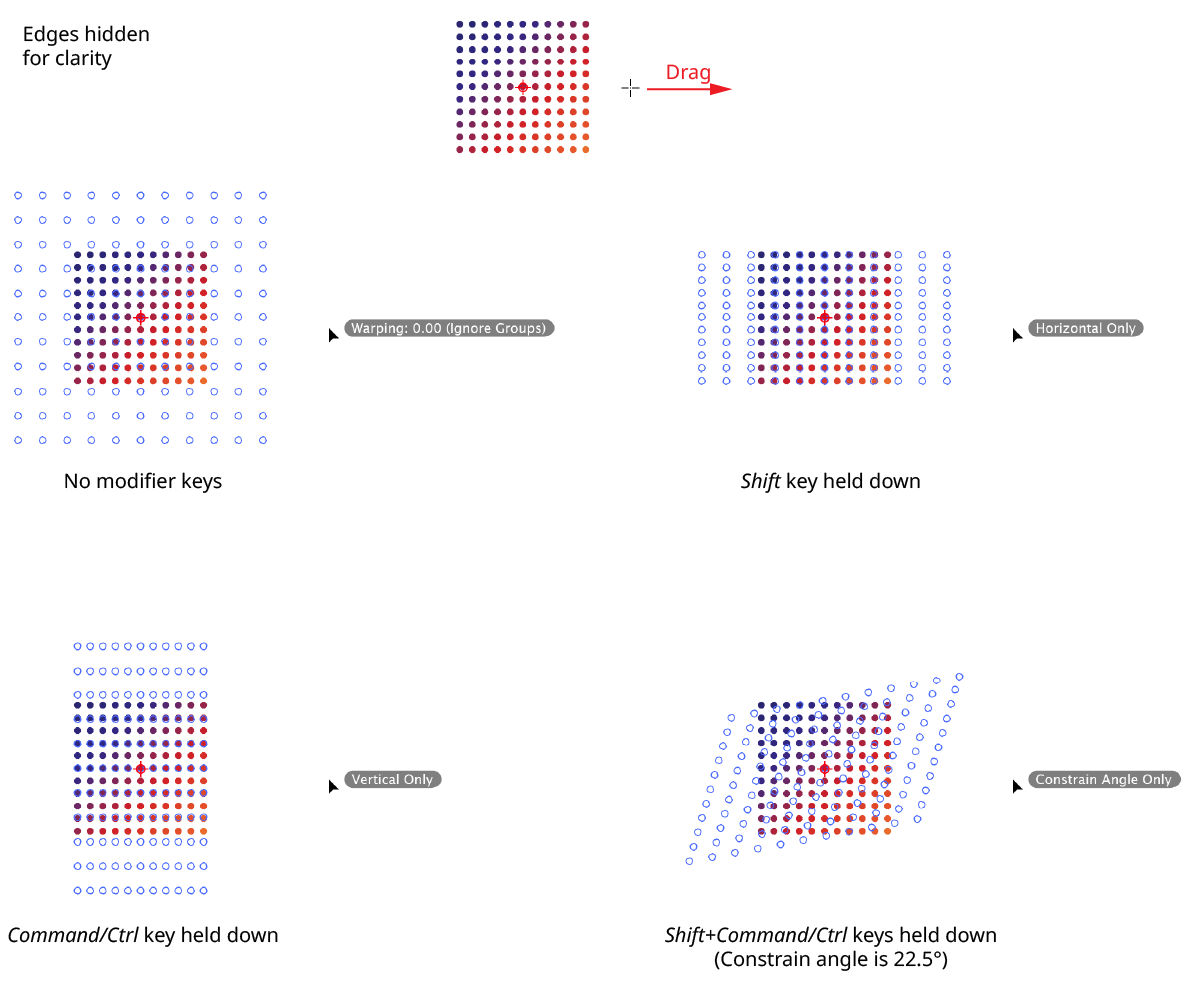
Inflate Deflate with Modifier Keys
The following non-modifier keys can be pressed while dragging the tool:
Up/Down Arrow: Increases or decreases the “warp factor,” a setting which controls how bulged or pinched the results are. It can range from 6.0 to –6.0, with values above zero causing the objects to appear to bulge out, and values less than zero causing them to pinch in. The effect is most apparent when used on regularly-spaced objects.
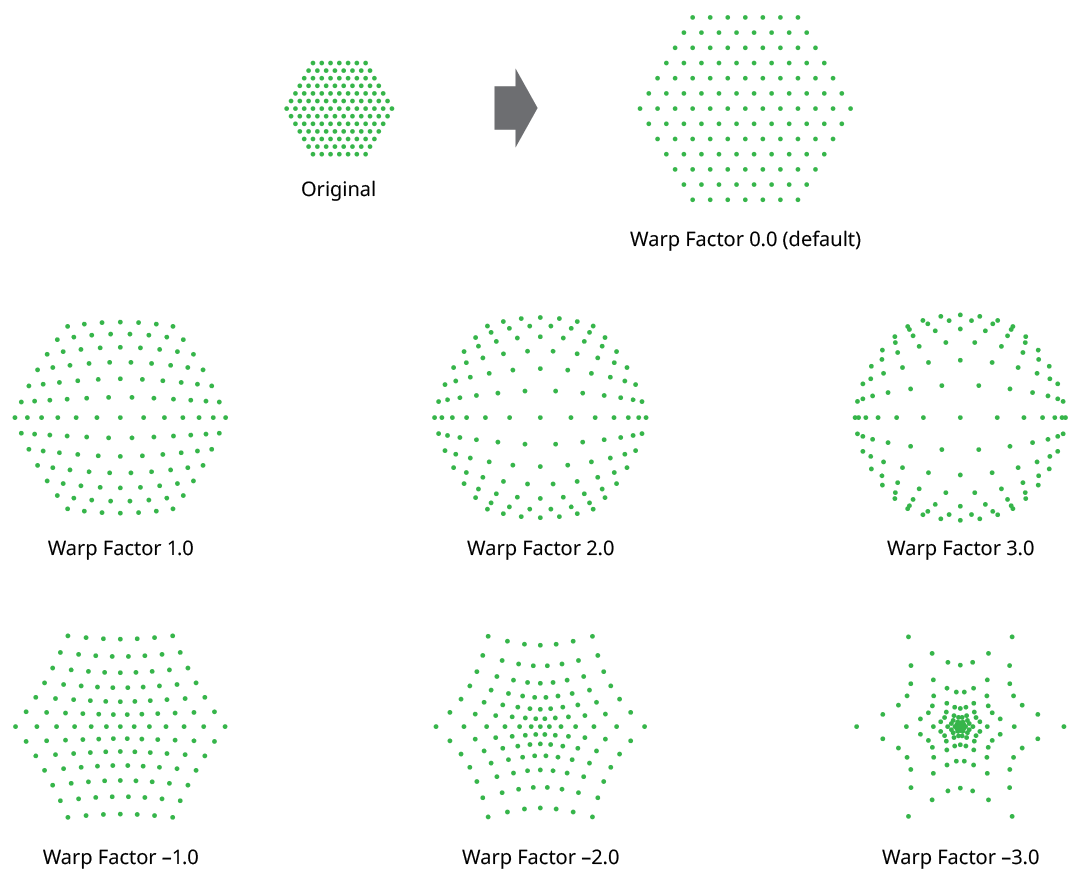
Inflate Deflate Warping Factor
1: Changes the warp factor to 1.0.
2: Changes the warp factor to –1.0.
G: Toggles the Ignore Groups preference (see Inflate Deflate: Preferences).
R: Resets the warp factor (to zero).